Solved-Increase KVM VM Image File Size 3
Seems that 2GB isn’t enough for some specialized PBX Linux solutions to build, so I found myself needing to increase the size of a KVM virtual machine image on running Ubuntu Server 10.04 Lucid Lynx in the VM. This technique probably will not work for sparse or VMDK-based VM images. It should work for Xen and KVM IMG-base VM files, however. Anyway, below is how I did it.
Starting Point
The HostOS is Ubuntu Server x64 10.04.1 running current KVM levels. I used virt-manager to create the VM in question. During the installation of this client/guest VM, the machine was slow. That doesn’t really say how slow it was – REALLY SLOW and the Ubuntu installation of the HVM Ubuntu x64 Server 10,04 VM only seemed to use 1 CPU even though 2 were allocated. Further, I’d given the VM 2GB of RAM just so there weren’t any memory constraints. The disk was virtio and set to be a little over 2.5GB in size. This VM is planned for running FreeSwitch. I’m hoping that HVM will let FreeSwitch work better than my paravirtual Xen attempt a few weeks ago did.
Host OS: Ubuntu x64 Server 10.04.1
Client VM OS: Ubuntu x64 Server 10.04.1
Virtualization: HVM using KVM current
VM Management: virt-manager
2684354560 bytes is the VM-orig.img file size. It contains a small swap partition, but 2.5GB is for /
After the OS install, update, upgrade cycle, then pulling the latest FreeSwitch from ‘git’ repository and doing the build, it seemed to finish without building everything expected. I’d recently built this software stack on another VM (Xen) and had my notes available. Only 2 of the 10+ .DEB files were created this time. The first thing that I checked … disk space. 100% used. Ok, I need to make it bigger.
Usually, I’d just delete the VM and start the process over, but that had taken more than a hours due to performance issues. BTW, switching from User Mode running the VM to running it as root seems to have addressed the performance issues. I’m new enough to KVM that it should be expected some of my choices would be less than optimal. I am using virtio for both disk and networking, also a bridge was setup on the host OS, so user mode networking is not used either any more. Performance has improved significantly. There are probably other things to make it faster, but as long as I remote in from another machine over ssh, this VM seems very fast.
Back to increasing the available storage. I did a little research about creating a new .IMG file with DD (that’s how you do it for Xen FULL image VMs) and started down that road. There’s a difference between the way I built the Xen VMs and how virt-manager builds KVM IMG files. With Xen, the swap partition is a different file, not contained within a single IMG. Sure, there are ways to set it up that way with KVM, but I hadn’t done this.
To increase the file size needs to be split into 2 parts. Increase the physical file size followed by resizing the logical partitions inside the file. Actually, I had to rearrange them to make room for the increased hda1 size. I suppose adding another partition would have been easier in the short term. If this were a VM with users connecting and running jobs, I’d probably make /home and /usr/local in different partitions too.
Physical Growth
This was fairly simple.
- Shutdown the VM (if it is running)
- Create an empty file to be concatenated onto the end of the orig.img file. In my case, I wanted to add about 2.4GB more storage.
dd if=/dev/zero of=./addition.img bs=1M count=2496 - Concatenate the 2 files into a 3rd file. This will add 2.5GB with 2.4GB and the outcome will be a physical file that is just under 5GB
cat VM-orig.img addition.img >> new.img - Move the newly created, larger file into the same file name as the original was – what the VM knew. If you want to keep the old file (and you should), move it to a different name.
That’s it for this step, but logically, the insides of the file-based partitions haven’t been changed at all.
Make a backup of the new file now since the next steps could damage it and you’d like to start from here.
Logical Re-arrangement / Resizing
To accomplish this part, I pulled a gparted ISO image and setup the VM to boot from it (CDROM Boot). With gparted booted, modifying the logical partitions is simple.
What I saw was:
- vda1 = 2.5GB – Linux
- vda2 = Extended
- vda5 = 200MB – Swap
- Unused
To expand vda1 is what we need. During this process, just be careful with vda1 – that’s where all our data is. Here are the steps that I used:
- Boot the Gparted Live CD from the ISO
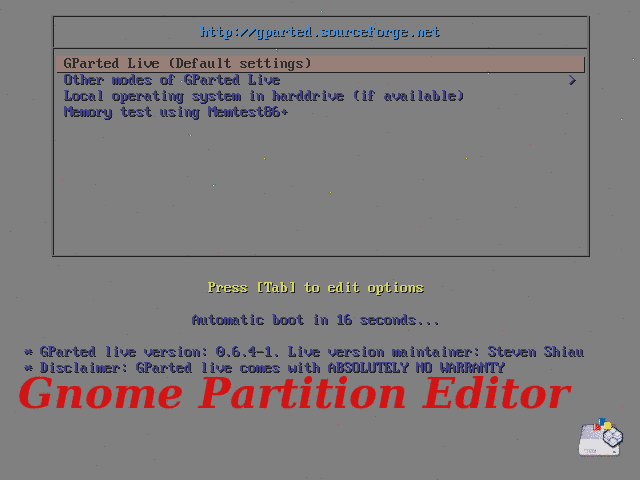
- Select the expected keyboard and other boot options.
- Delete the swap partition, vda5. It appears the default setup places swap inside an extended partition (not a primary partition)
- Delete the extended partition, vda2
- Resize the vda1 partition using the resize tool, but leave some room for the swap partition – I used the slider bar.
- Add a new primary partition, vda2, size it however you like, but I just used the remaining space, and make it Linux-Swap
- Right click on the new swap partition and format it as Linux-Swap
- Write the changes to disk, verify they appear to be what you want. I think I saw a very quick automatic file system expansion dialog for vda1 as EXT4, but I did not format it as that would have destroyed all our precious data.
- Shutdown the Gparted OS
- Inside your virtual machine manager, remove the Gparted CDROM ISO from the VM and change the boot order so the first HDD gets booted again.
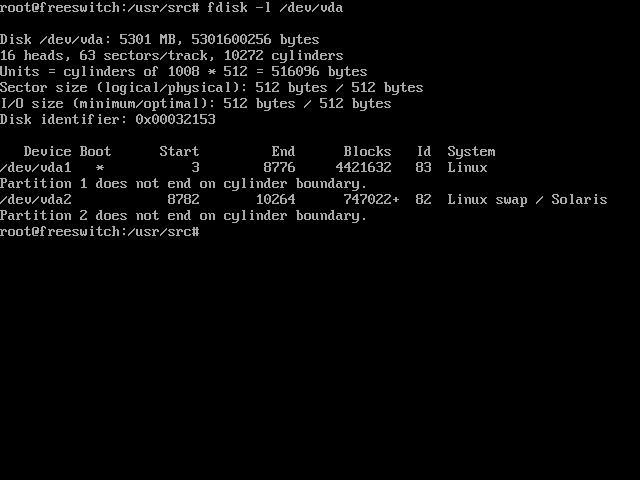
- Boot the VM and verify that /dev/vda1 is larger and reasonable.
What I ended up with was:
Gparted Screen:

After booting into the VM:
The boundary warnings don’t seem to impact anything that I can see. Inside gparted, the unused space wasn’t displayed until it was too late and I didn’t want to go back and attempt to correct it. Good enough is the code word for today.
/dev/vda1 appears to be 4.3GB – nice, but what happened to the SWAP? Since the UUID doesn’t match what was used during installation, we need to manually add the swap so it will be used.
swapon /dev/vda2ls -l /dev/disk/by-uuidswapon -aAll that is left is to reboot the VM and start using it to finish the rest of our FreeSwitch installation. Actually, while I’ve been writing this entry, the build of freeswitch was running and it finished a while ago. I love it when a plan comes together.
When the VM is off, be certain to replace the backup file from the Physical Growth steps and make a backup of the new.img file. Also, clean up any temporary files that we made unless you need to increase other VMs with the blank.img.
As everything in UNIX, there are many ways to accomplish a task and this is just 1 of those. I think it will work with any full-image-based VM file. I don’t think it will work with sparse or VMDK files. Sorry. Were any of my steps unnecessary?
Trackbacks
Use the following link to trackback from your own site:
https://blog.jdpfu.com/trackbacks?article_id=846


The nice folks over at HowTo Forge explain how to setup KVM virtualization on Ubuntu 10.10.
Proxmox seems to be an easy KVM management tool that supports adding multiple physical systems into the central management web site.
Here’s one non-trivial setup from a Sun Engineer":http://www.fridu.org/fulup-posts/40-hosting-a-sysadmin/52-openvz-virtualization#architecture
I haven’t tried it yet and I’ll be limiting my trials to KVM VMs, not OpenVZ due to some reported issues that I’ve read about.
I’ve been busy deploying a KVM infrastructure here. This weekend, I created a Windows7 Media Center inside a KVM VM. Well, Windows is looking out for me … a little too much and warning about low disk space conditions for the data partition. Yes, I used 2 different virtio drives in this build.
the Recorded TV/ partition was 50G – more than enough for an evening of recorded sitcoms. To make the low disk warnings go away, I decided to increase the size of the 2nd partition to 90GB by following the steps above. The only difference here is that instead of using gparted, I used the built-in Windows7 partitioning tool.
created 40G more storage and
concatenated the original file with the additions into the file name expected by the OS. Doing the initial addition.img creation was 5 minutes. Doing the concatenation took much, much longer (30+ min) since we were reading and writing to the same physical HDD. Now I know that doing the concatenation was a complete waste of time. Creating a new, completely empty, file would have been faster and accomplished the same end-result.
Don’t forget to correct any file ownership and permissions as needed.
Next I booted the OS and visited the partition tool. The new data partition appeared as a completely new HDD and needed to be initialized. All data was lost. For me, that wasn’t important, but if I needed it, I could have added the old virtual HDD file to the VM and manually copied all the data over, then removed the old virtual HDD file.
Win7 assigned the HDD to drive letter “D:” and Media Center created a Recorded TV/ folder automatically. The Shared Folder settings worked from other machines too.
Life is good. Time to delete the intermediate files. It is an extra 90G after all.